Multimaterial Printing Without the AMS
Multicolor or multimaterial printing is, in theory, possible with any kind of printer if you have the right g-code. In fact, it is entirely possible to print in multiple colors or materials without the AMS, as long as you welcome the additional hassle of manual filament swaps. The AMS does not give the possibility of multicolor printing, but the convenience of automatic filament swaps needed to achieve it.
In my search for methods of multimaterial printing, I’ve come across this reddit post by _Mister_Anderson_. This is the same method, with some additional tips.
With this method, you’ll be able to print with multiple filaments in the same layer, or in different layers.
Preparing the Custom Filament Profile
In order to achieve multimaterial printing, we’ll need a custom filament profile that will automatically pause the printer when it detects a color change. You must first select a multimaterial print or any print that uses the AMS. In this example, I’ll be using a keychain file from Makerworld.
I’ll be using Orca Slicer but you can use PrusaSlicer, or Bambu Studio to achieve similar results. Follow the steps below to prepare the filament profile.
Steps: Filament Settings
1. Make sure you have the “Advanced” option switched on. Click on the Edit button beside the filament type that you want.
2. Once inside the Material settings window, click on the “Advanced Tab”.
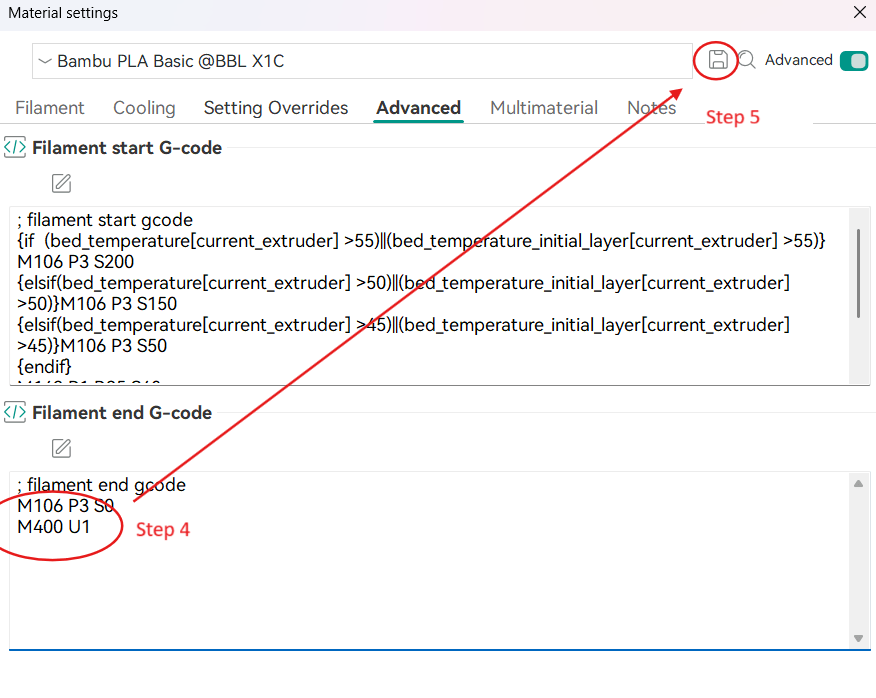
3. You’ll see the “Filament end G-code” box with the default values. This is where we will add the pause code.
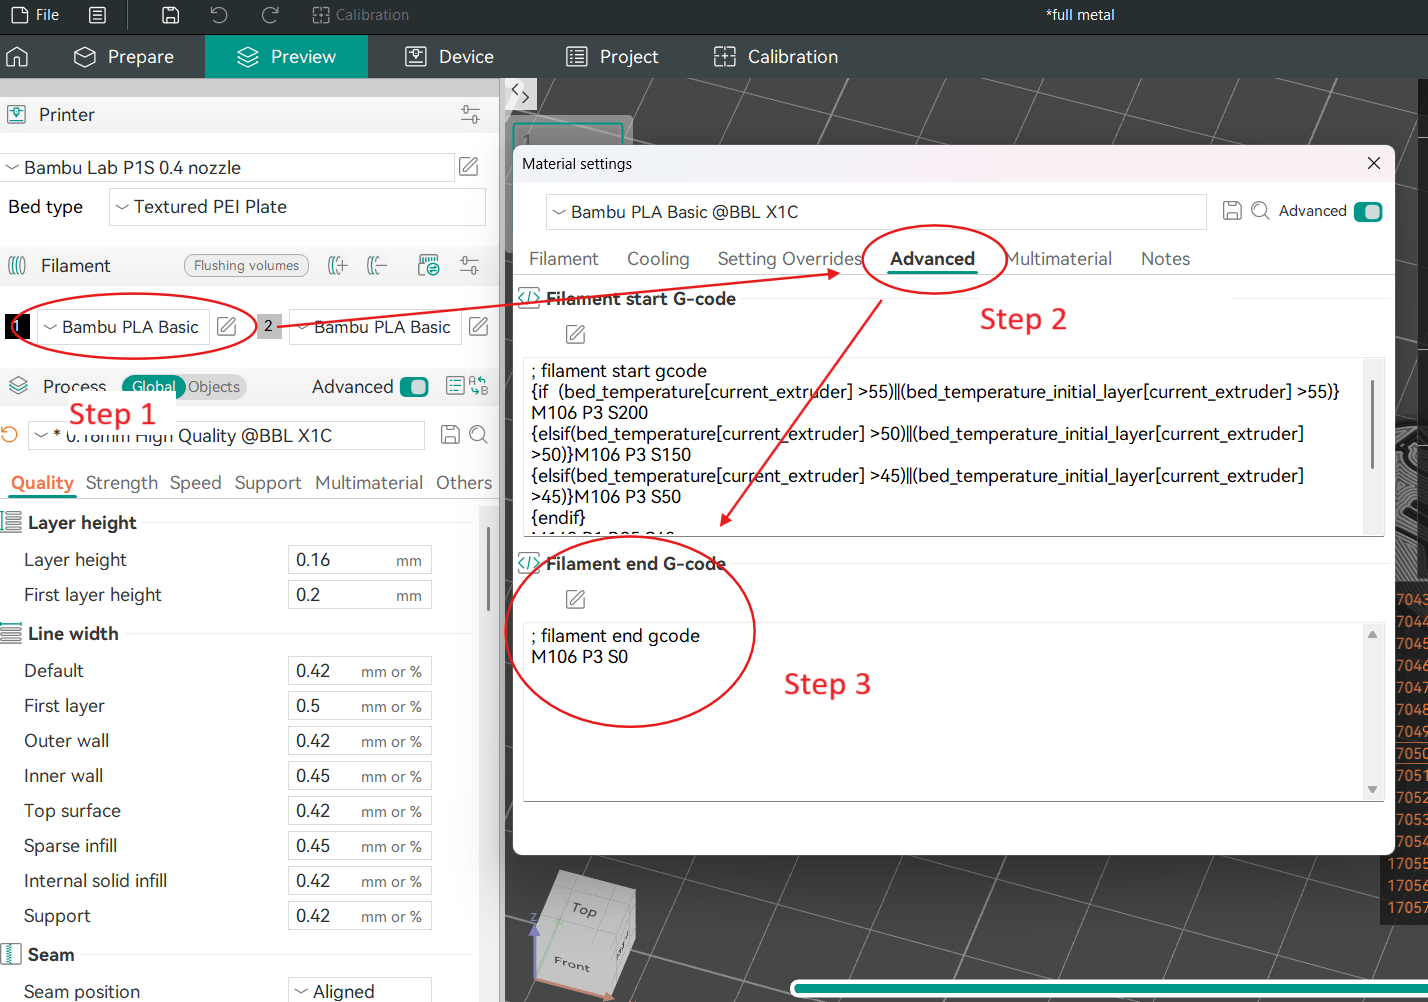
4. Add the following G-code at the end: M400 U1
5. Click on “Save” and name your new user preset.
Printing with the Custom Filament Profile
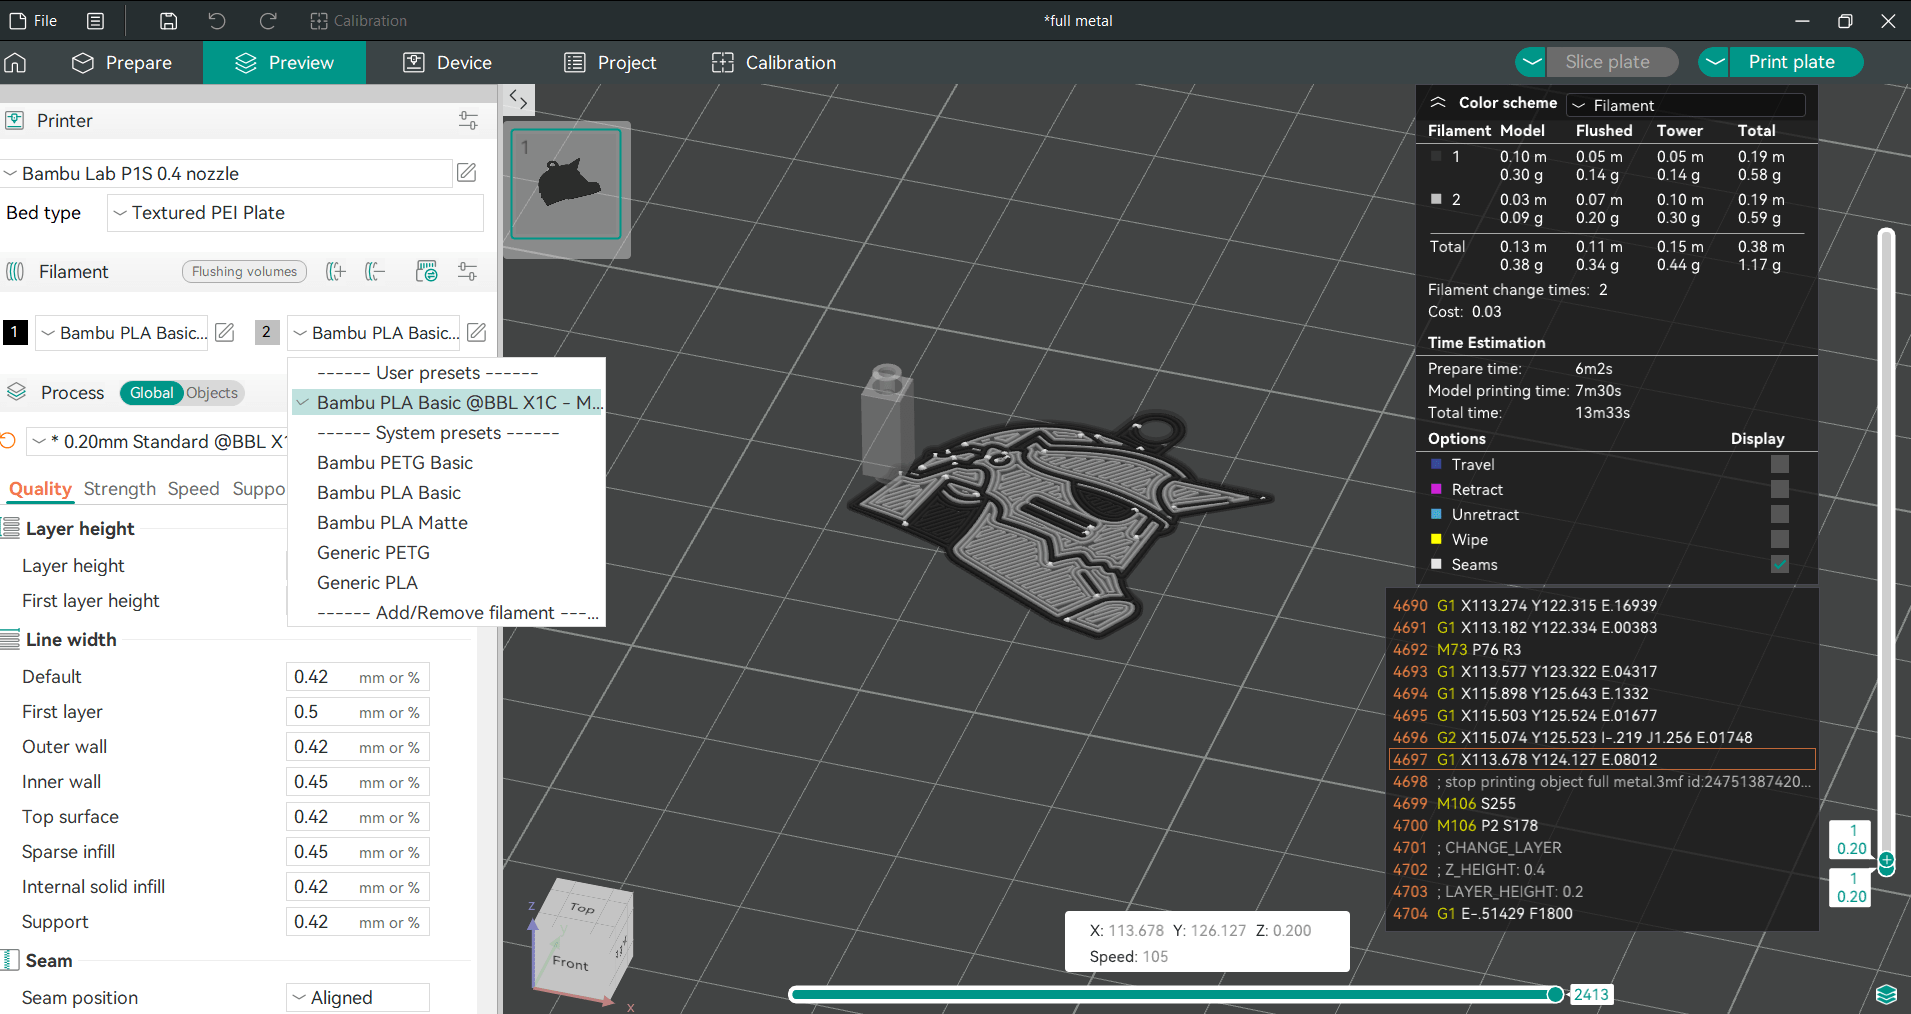
Once you have the settings above prepared, you can now set the filaments in your print file to the profile you’ve made. You can also set the colors, although at this point it won’t matter much since the color selection will be handled manually. Once you’ve set all filaments, you can click “Slice plate“.
Optimizing Filament Swaps
Since we’ll be doing the filament swaps manually, we want to minimize the times we would do that. In this example, there will be two layers: Alphonse’s helmet on the first layer, and a plain black back on the second layer. We can track which color would go first by inspecting the toolhead path on layer.
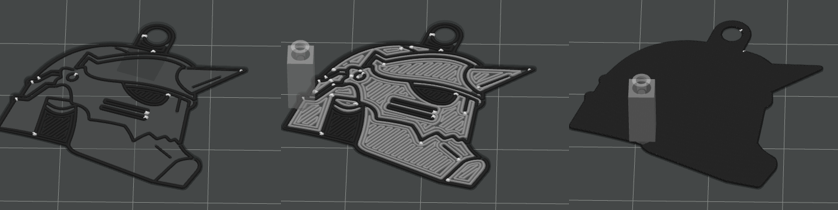
You can see in this example that the first layer starts with black, then changes to grey, and goes back to black for the second layer. This would require a filament change twice:
Black –> Change –> Grey –> Change –> | Black (2nd layer)
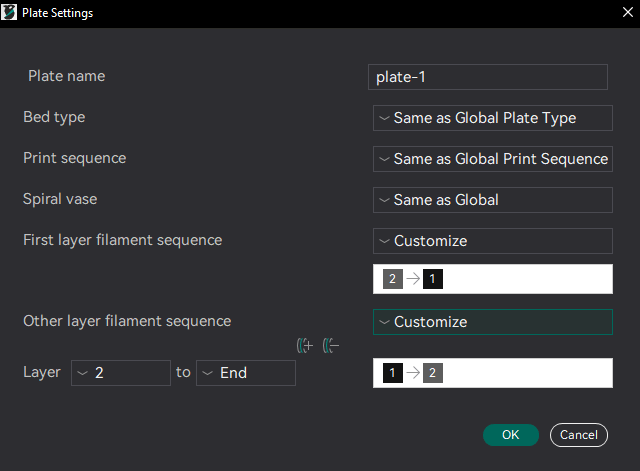
A more optimized setup would look like this:
Grey –> Change –> Black–> | Black (2nd layer)
This reduces the needed filament swaps to just once. We can achieve this setup by modifying which areas the toolhead will print to first.
Steps: Changing Filament Sequence
1. Go back to the “Prepare” tab.
2. Go the the print bed and click on the settings icon beside the bed.
3. Look for the “First layer filament sequence” and the “Other layer filament sequence”. We’ll change the order here.
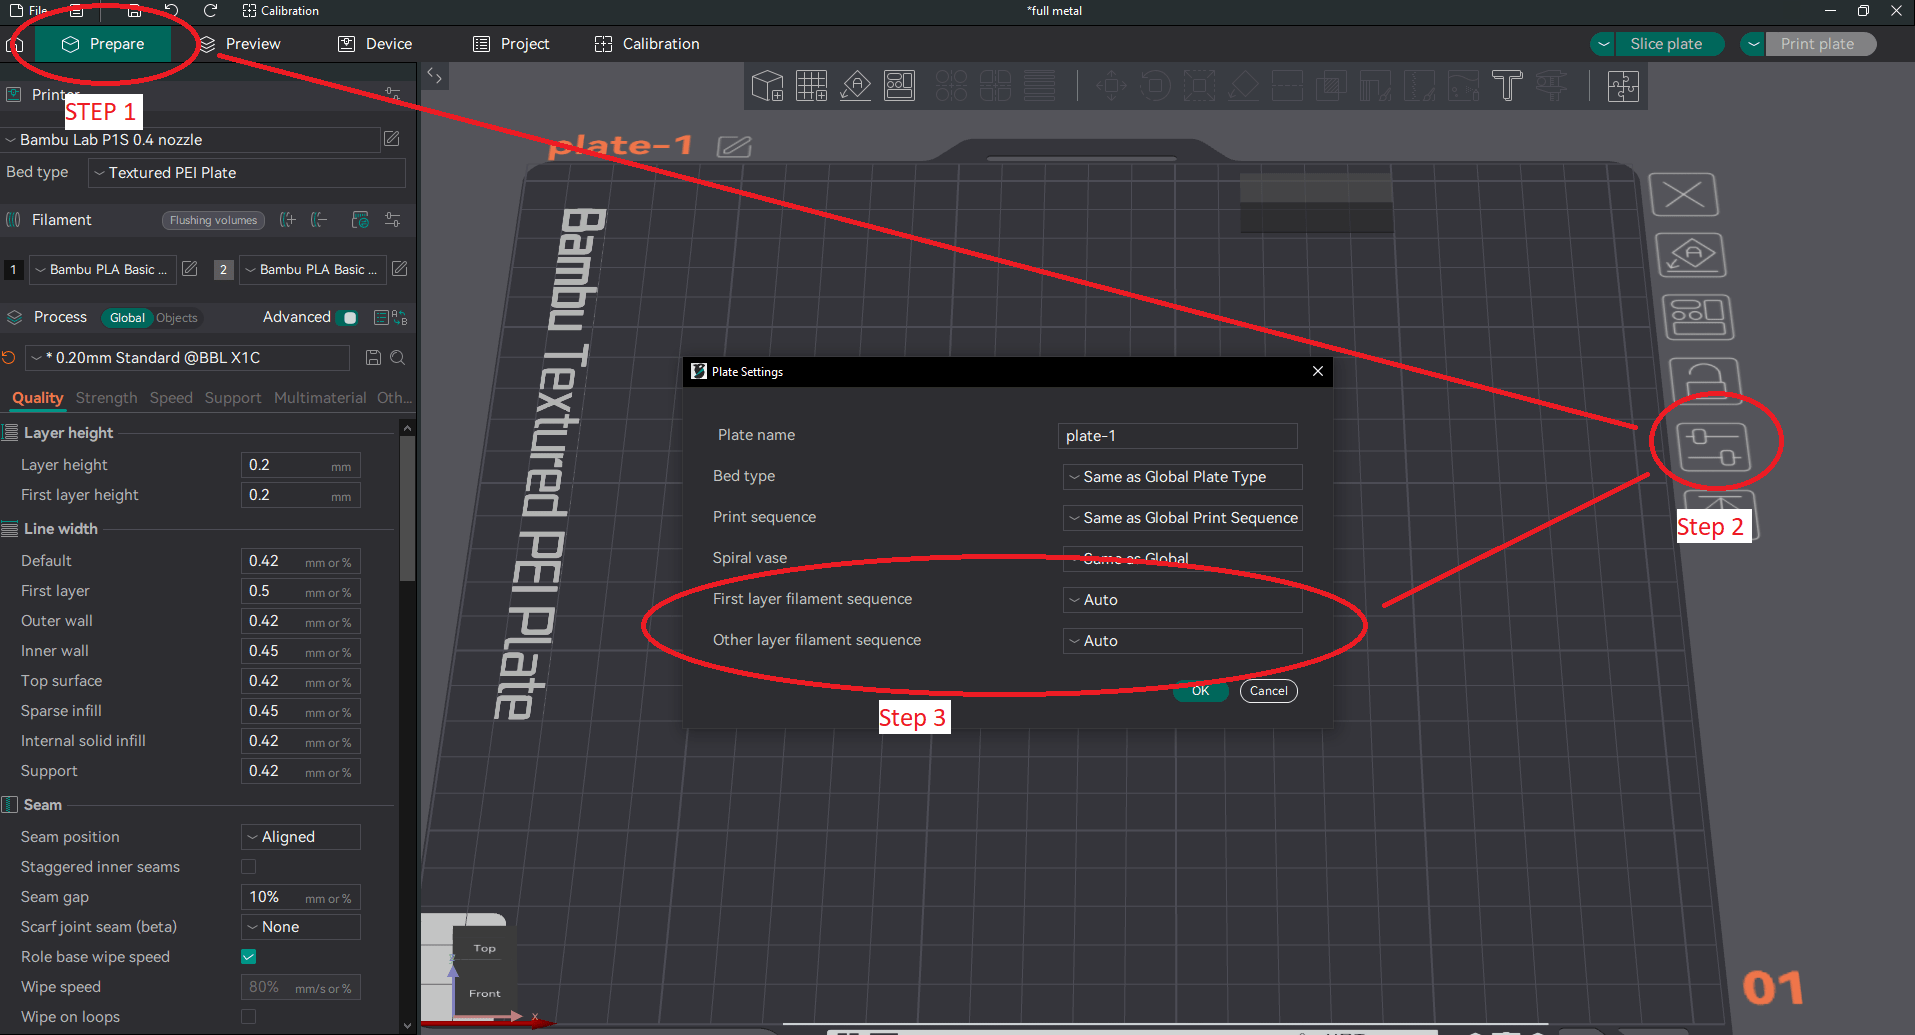
4. Set the First layer filament sequence to your desired order. In this example, I want to have the grey areas filled in first before black. For the rest of the print, I want black to be prioritized since there are no further color swaps needed.
A Means to an End?
Congratulations, you’ve made it to the end. Now with the power of multimaterial printing without an AMS in your fingertips, it might be tempting to finally try out those large, colorful prints, right? Well, you’ve probably realized that multiple color changes across many, many, layers will come with a painstaking and time consuming process of manually swapping out filaments each time. So that large pokeball, or multicolor segmented dragon will require hundreds of filament swaps. If you value your sanity and time, an AMS will be worth it compared to this. This is not a replacement for an AMS.
However, this method is great if you need just one or two layers that need multiple filament types. Having a logo, name, or any sort of colorful design on one of the outer layers will surely enhance your prints. Have fun!
